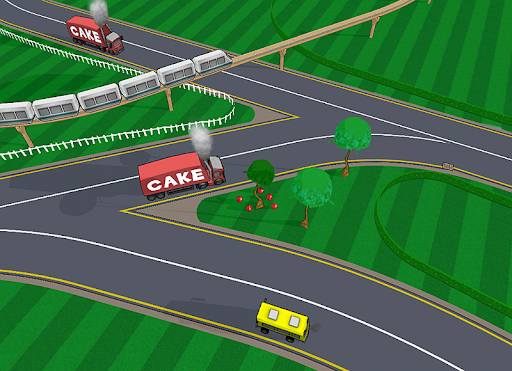
Recently, I have been trying to improve the complexity of the road layout by adding junction assets.
With rail track, this is a simple problem to solve, as the junction assets consist of two elements; ballast and rails. With roads however it required a bit of experimentation to come up with junction assets that would work correctly and provide the 'clean' look I was after.
Here is the cross-section for the road junction asset. The junction asset must contain two nodes called 'Ballast' and 'Rail' (both case sensitive) for it to render correctly across the junction. In my road junction asset, you can see the 'Ballast' asset represents the tarmac, and the 'Rail' (not used in this case) is simply hidden below the road.
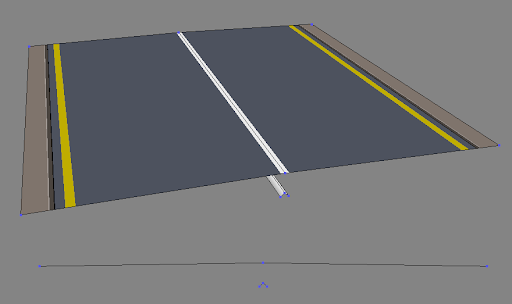
With a very subtle hump in the centre of the road (see the cross-section above), the road polygons cleanly intersect one another without any z-fighting issues.
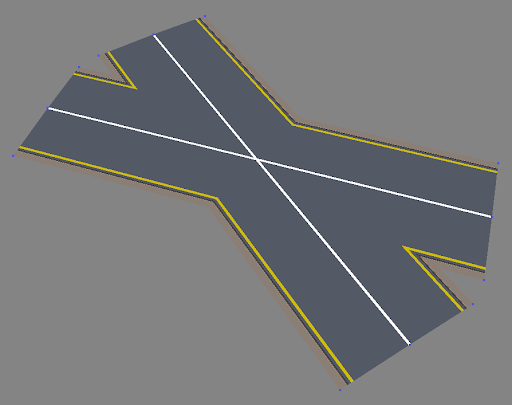
I've also placed small 'filler' assets at the apex of the internal corners to help with the visuals. This is the result in-game.
Saturday, 28 March 2009
Tuesday, 24 March 2009
Eastern District
Here are a few screenshots to give a flavour of the Eastern District. The only new assets here are the overhead banners stretching from building to building. These simple assets are double sided and mapped so they can be viewed correctly from both the front and back.
And at dusk...
And here is a similar shot showing the monorail cutting through the centre of the cityscape.
And at dusk...
And here is a similar shot showing the monorail cutting through the centre of the cityscape.
Monday, 23 March 2009
Tower Blocks
I've also been busy building a few er...buildings. Tower blocks more precisely for the Eastern District in my route. Once again these are very simple assets, low polygon count and low texture resolution. These will be used in the centre of town, where neon signs and billboards will be the dominant features.
For the banners and fake logos, I've used a cool free font (called Massive 10 K) by Keisuke Asami. It seems to perfectly suit the style I was after. So thanks Keisuke Asami for the work on the font.
Monorail - Maglev
I'd always planned on creating a monorail as that type of vehicle would allow a higher viewpoint/perspective of the route below.
I'd seen some cool photos/movies of the 'Maglev' and a work colleague suggested I make one. This is my intepretation of it.
Once the main engine was built, to build the passenger cars (and I'll make no secret of this) I simply sliced the back-end off the model and mirrored it to create the passenger car. I won't be putting text on the sides of this loco so it didn't matter that the mapping was mirrored front to back. It's a very dirty and cheap method, but works perfectly in this instance.
The track was a simple loft cross-section asset with the concrete support posts setup as population geometry.
Distant Buildings
As I don't intend on building a vast huge sprawling route (this route will be small and detailed), I needed a cheap asset that I could place in the distance and give the illusion of distant objects. This seems to work well. I opted for a scenery object rather than a loft because I wanted night nodes that would illuminate the windows at night.
Here is the single asset. It's a single polygon and uses a texture with transparency.
Thursday, 12 March 2009
Screenshot update
Thursday, 5 March 2009
Seasonal variations
Tuesday, 3 March 2009
Characters
Here is a render of some of the characters I've been working on. So far, I have created an old man, a couple of business men, a cyclist and a girl.
I'll be the first to admit, I'm not an animator. I don't know how to 'rig', paint vertex weights, or even create a realistic looking character mesh. I believe that whole area is a skillset in itself and if you've ever seen my animations, I think you'd agree that I'm wise leaving all that complicated stuff to those animator boys.
For Rail Similarity, I wanted a very simple character mesh, one that I could easily re-skin over and over, and one that even I could 'animate'. I chose a very old school approach, and made it from segmented nodes.
Because of their blocky appearance, the end result almost makes them look like papercraft (Pepakura). I must try making one of these characters out of paper at some point.
Once I'd mapped a single character mesh, the re-skins themselves were very easy to create. I'm pleased with the variety I can get from the single mesh. I have cheated though by adding a simple accessory to a few of the characters; umbrella, briefcase, balloon.
Here they are in Rail Simulator :
Subscribe to:
Posts (Atom)